Location: Settings > General > Booking settings
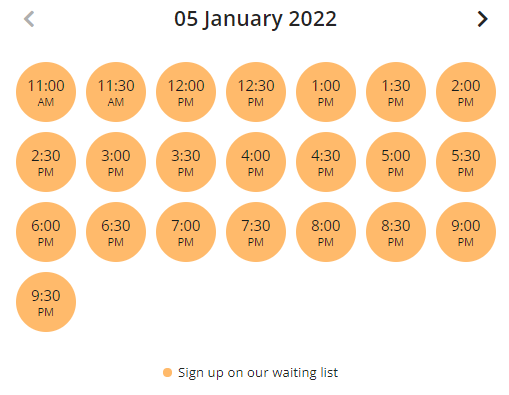
The waiting list is a feature that’ll let you have a waiting list for fully booked times, so if a guest cancels their booking, then another guest who’s signed up on the waiting list can be contacted by the restaurant.
To make sure you can use the waiting list, you’ll have to enable the feature in the booking settings first.
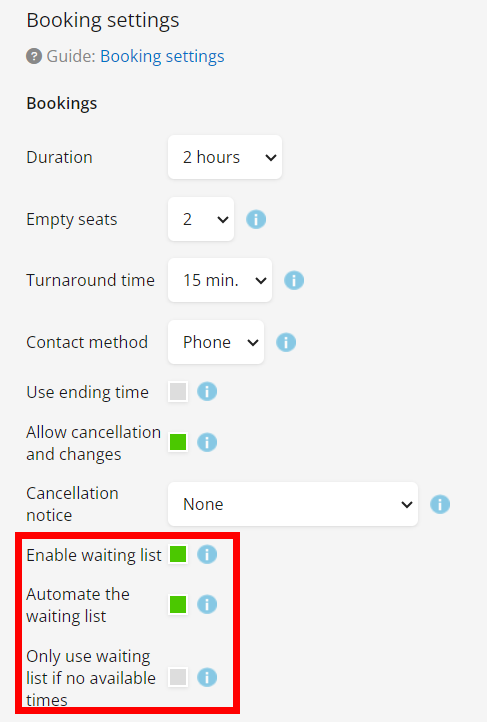
Automate the waiting list: When a table becomes available, the guest will receive an e-mail to confirm or deny the booking. If they accept the table, then they will automatically get an e-mail confirmation shortly after. If they deny it, the system will go to the next person on the waiting list.
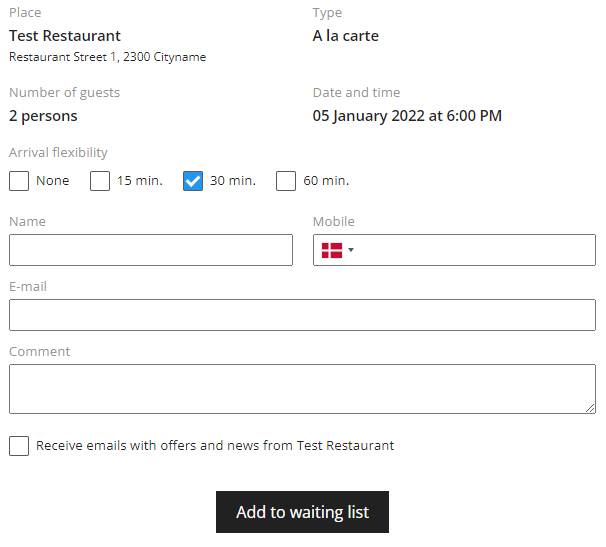
The guest will be taken to the page where they go through with their booking. On this page, there are a couple of new tick boxes that’ll let the guest choose how flexible they are with their timeslot.
The guest will get four different choices in terms of arrival flexibility (None, 15 min, 30 min, 60 min), this will determine how far outside the desired timeslot the guest would be able to book a table. In the example above the guest would be able to book a table at 5:30 PM and 6:30 PM also, if any of the timeslots opens up.
From the restaurant’s perspective, you can now see the waiting list on the frontpage of easyTableBooking.
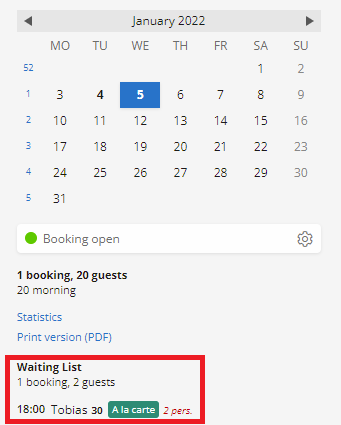
Here you get the information that Tobias has written himself on the waiting list for 18:00 and that he has arrival flexibility of 30 minutes.
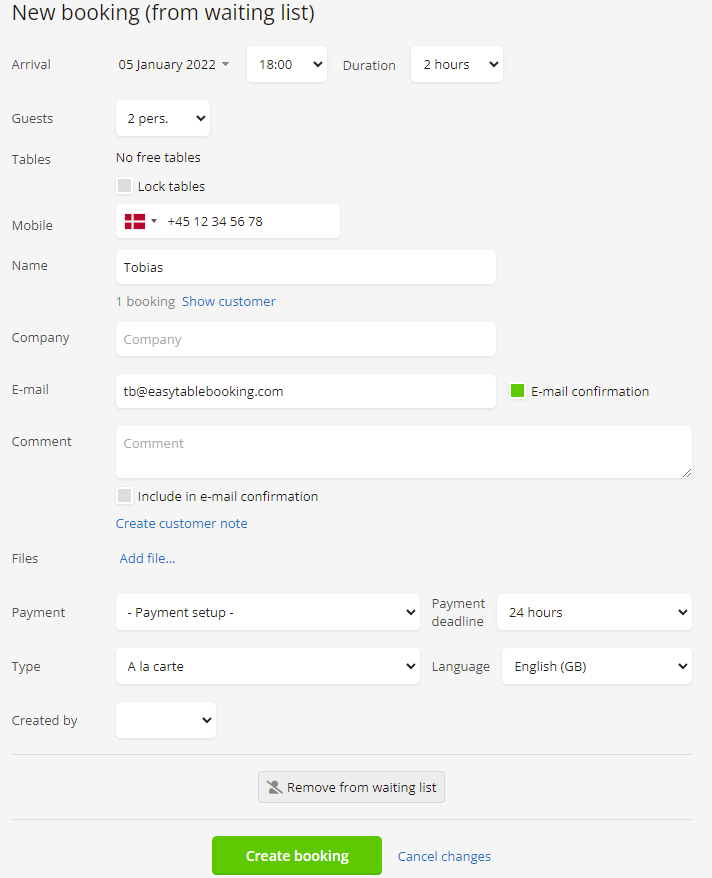
From this page you can now edit the guest’s information, choose to remove them from the Waiting List, or Create the Booking if the restaurant frees up the space.