Before we set up preordering, it’s a good idea to know which products you want the guests to choose from. This way we can arrange the products in different categories/groups. This will make it much easier to work with later on.
Step 1 – Set up product groups (Internal categories).
Settings -> Preordering -> Products -> Groups.
The groups we use to categorize the different products that you will later add. The name of the group is internal and won’t be visible to the guests. In my example, I will be adding the groups “Menu” and “Add-on”.

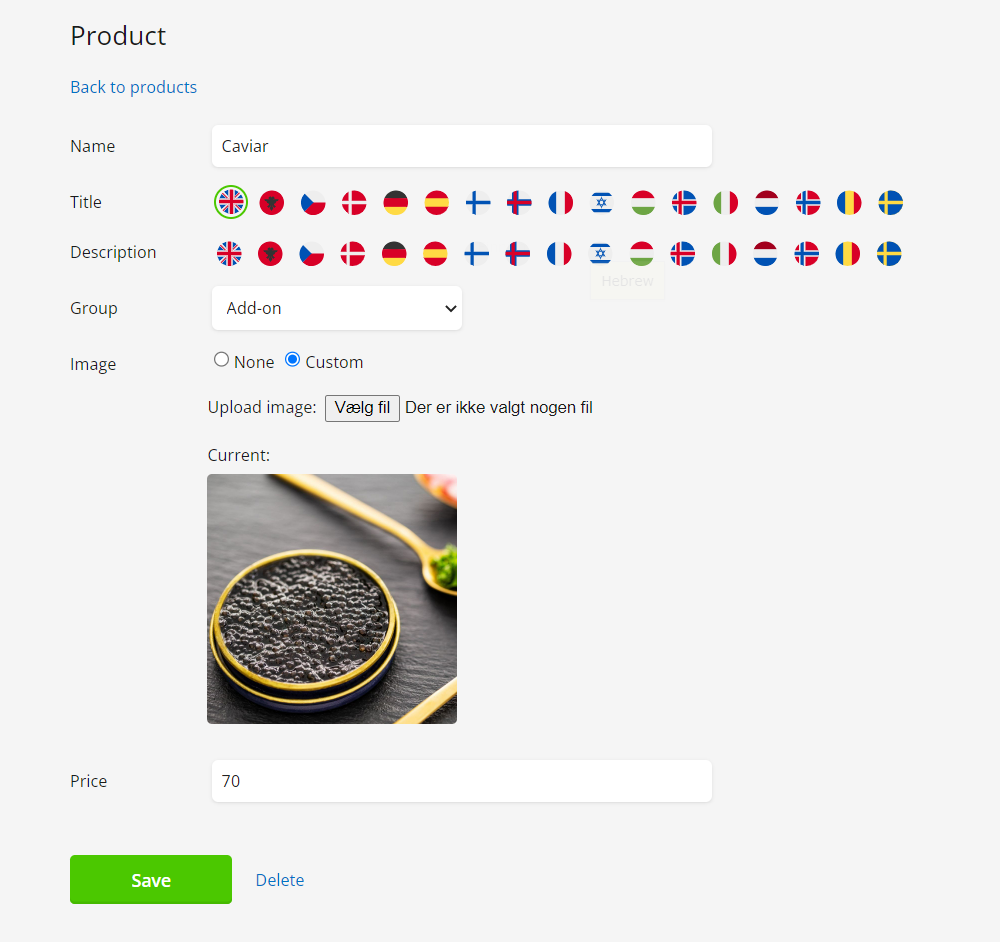
Step 2 – Add Products.
Settings -> Preordering -> Products -> Products.
The products are what the guests will be able to choose from if added to a preorder setup. In this example, I will create a Menu with the price of 60 EUR along with a picture and description. I will also create an add-on product.

Step 3 – Section (External categories)
Settings -> Preordering -> Products -> Sections.
Sections are used to divide the products into external categories, so it will be easier for the guest to find the right products. Fx, Menus, Add-ons, Drinks. In this example, I will create a section for menus and add-ons.


Step 4 – Preorder setups.
Name: The internal name will only be visible in the backend.
Title: Overall title for the setup. This is visible to the guest.
Description: The description will be visible to the guest along with the title.
Required: The guest is required to select something from the pre-order setup when they make a booking. If this is not checked, then the guest can skip the preorder.
Requires prepayment: The guest is required to pay for the selected items before the booking can be completed. This requires a connection with Stripe or Nets Easy.
Currency: The displayed currency for the guest.
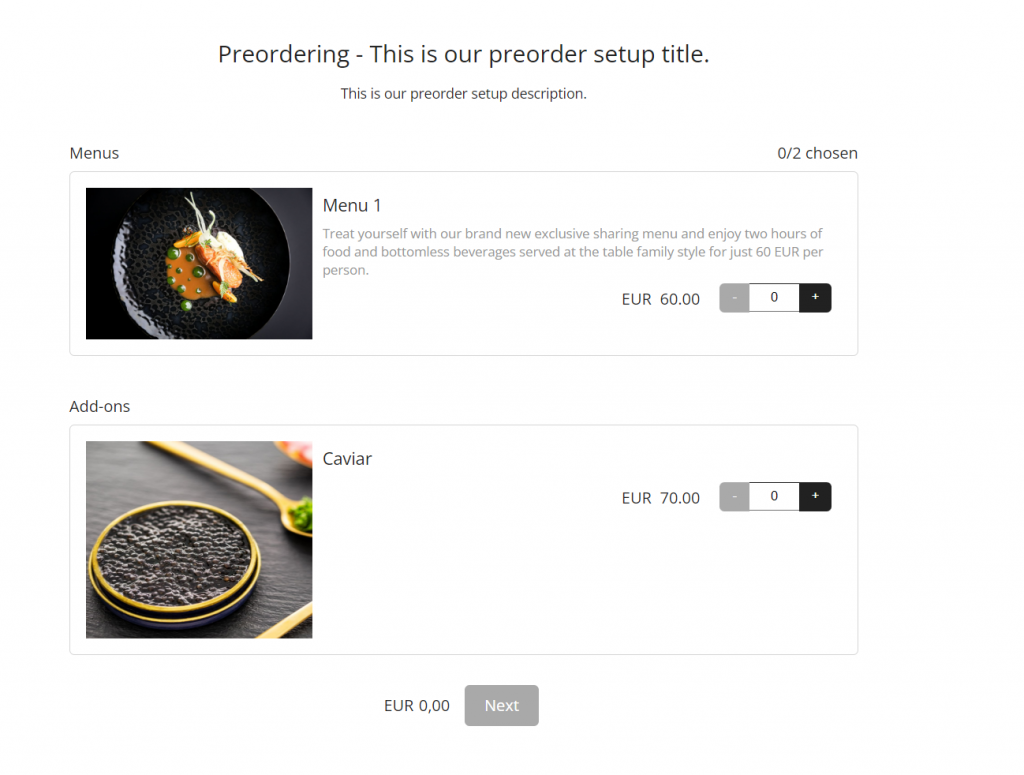
We have now gone through all the steps required for the preorder setup to work properly. Now we will have to select which sections we want on our setup. In my example, I will add my section for “Menus” and “Add-ons”

Once we have added the sections we want the guest to choose from, we then have to add our products to the sections. In my “Menus” section I will add “Menu 1” and in “Add-ons” I will add my “Caviar”. Once the products are added to the sections, we have to configure the restrictions for the sections/products.
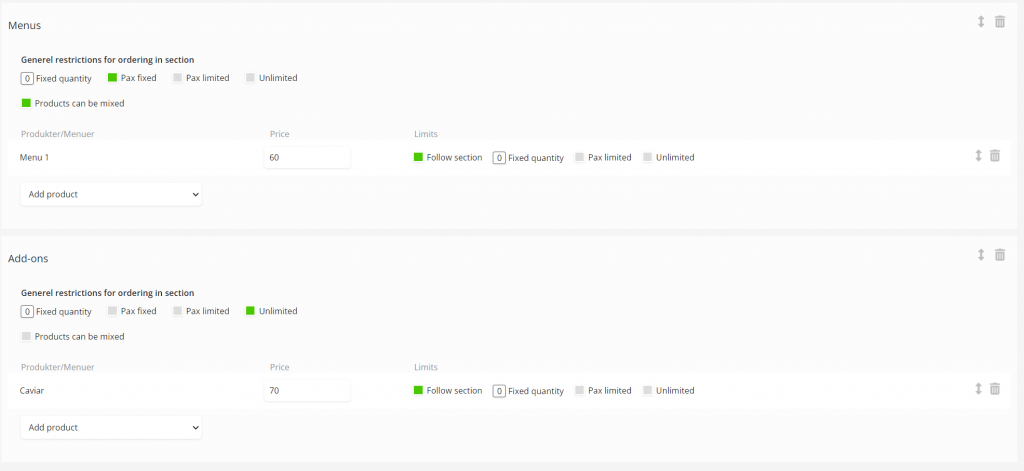
Overall restrictions can be set right below “General restrictions for ordering in section” If the products are set to “Follow section” then they will follow the restrictions set there. If the “Follow section” on the product is unticked, it will then follow restrictions set on the product.
Here is a small description of the different restrictions/limits.
Fixed quantity: If this is set to 5, then the system will pre-fill the product with 5 of those items. No more no less.
Pax fixed: This can only be set in the general restrictions. If this is ticked and the products are set to the “Follow section” then the guest has to choose products equal to the number of guests selected. This is mainly used for menus where the guest can’t order more menus than the number of people they are booking for.
Example: We are 4 people, then we have to choose 4 products if “pax fixed” is selected.
Pax limited: The guest can max choose the same amount that equals the number of guests, but unlike “pax fixed” it’s not required that they select 4 items for a group of 4.
Unlimited: The guest can choose as many as they want to. This is mainly used for add-ons.
Products can be mixed: This makes it possible for the guests to mix the products in that section. If you for example have multiple products in the “Menus” section. Like a vegan and non-vegan option, then you can select the “Pax fixed” along with the “Products can be mixed” – That way the guest all has to select a menu, but they can mix between different options. Like a vegan and non-vegan option.
Step 5 – Add the setup to the booking type.
For the last step you have to add the preorder setup to the booking type. If you don’t know how to create a booking type, see this guide.
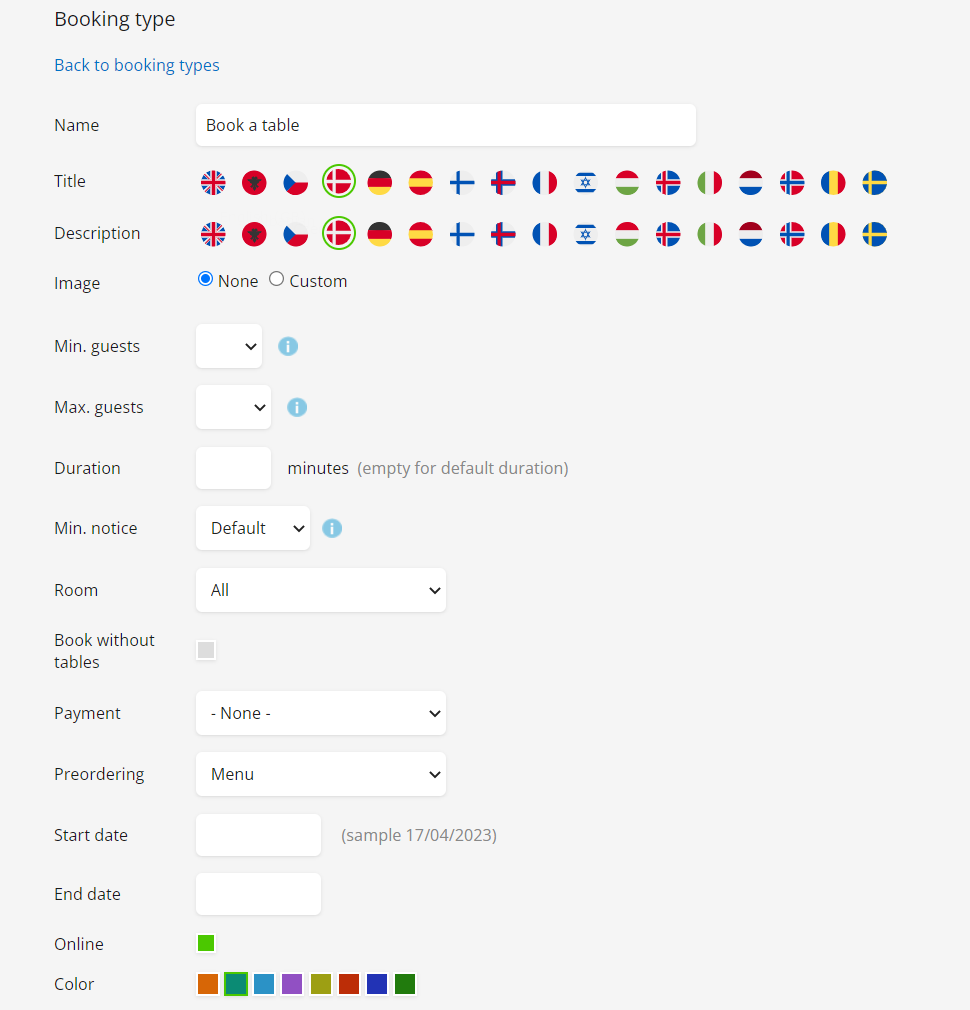
Go to Settings -> Bookingtypes -> Select the bookingtype you want the setup on -> Select the preorder setup on the bookingtype.
The setup is now complete.
To test the preorder, please go to Settings -> Implementation -> Bookinglink and code -> Test online booking.